
If you are reading this post, you have probably already decided to travel to Madeira. If you love outdoor, fresh air, amazing views – you will love your stay in this island :). Whatever your fitness level is, either advanced mountain hiker or trekking newbie, you will likely fall in love with this island. Hiking in Madeira is a must if you want to explore the most beautiful spots of this Portuguese archipelago. From Levadas (irrigation channels) walks to trails with breathtaking cliffs along the coastline, you will enjoy discovering the numerous walking routes available.
The island is a paradise for nature lovers. Thanks to its warm climate, the hiking trails are enjoyable all over the year. We spent a full week in Madeira at the beginning of November with a pretty nice weather. It was perfect to discover those dramatic landscapes. There is so much to explore, with subtropical forests, high mountain peaks and waterfalls.
Madeira has one of the most incredible and stunning hiking trails in Europe and even probably in the world. In total, you can choose between more than 100 walks spread all over the island! Hence even if you spend one month on the island hiking every day, you will not have tried each walking routes ;).
In this post, we have selected our favourite hikes. All of them are marked “PR” as they are recommended walking routes. We hiked ourselves each of them, either fully or partially. We are exciting to give you some tips and share our experience of our best hikes in Madeira.
Our key piece of advice, you don’t need to hike the full routes to discover stunning views. Some hiking trails can take over 6 hours, you can decide to walk only one part of them. If you want more details on the walking route, check out the official Madeira website from the tourist office.
Table of Contents
1. Verada do Pico do Arieiro – PR1
Key information on the hike
From Pico do Arieiro to Pico Ruivo – THE most popular hike in Madeira. If you are in Madeira for a short amount of time and you have to select only one hike, we highly encourage you to pick this one.
Our recorded data
- Distance – 13.8km (both way)
- Hiking time – 5 hours (both way)
- Elevation gain – 970m
- Starting point – Parking Pico do Arieiro
- Route type – Out & Back
- Difficulty – challenging
- What to bring and what to wear? – raincoat, hiking shoes, lamp (for the tunnels), 2L water minimum, snacks or lunch

Our experience
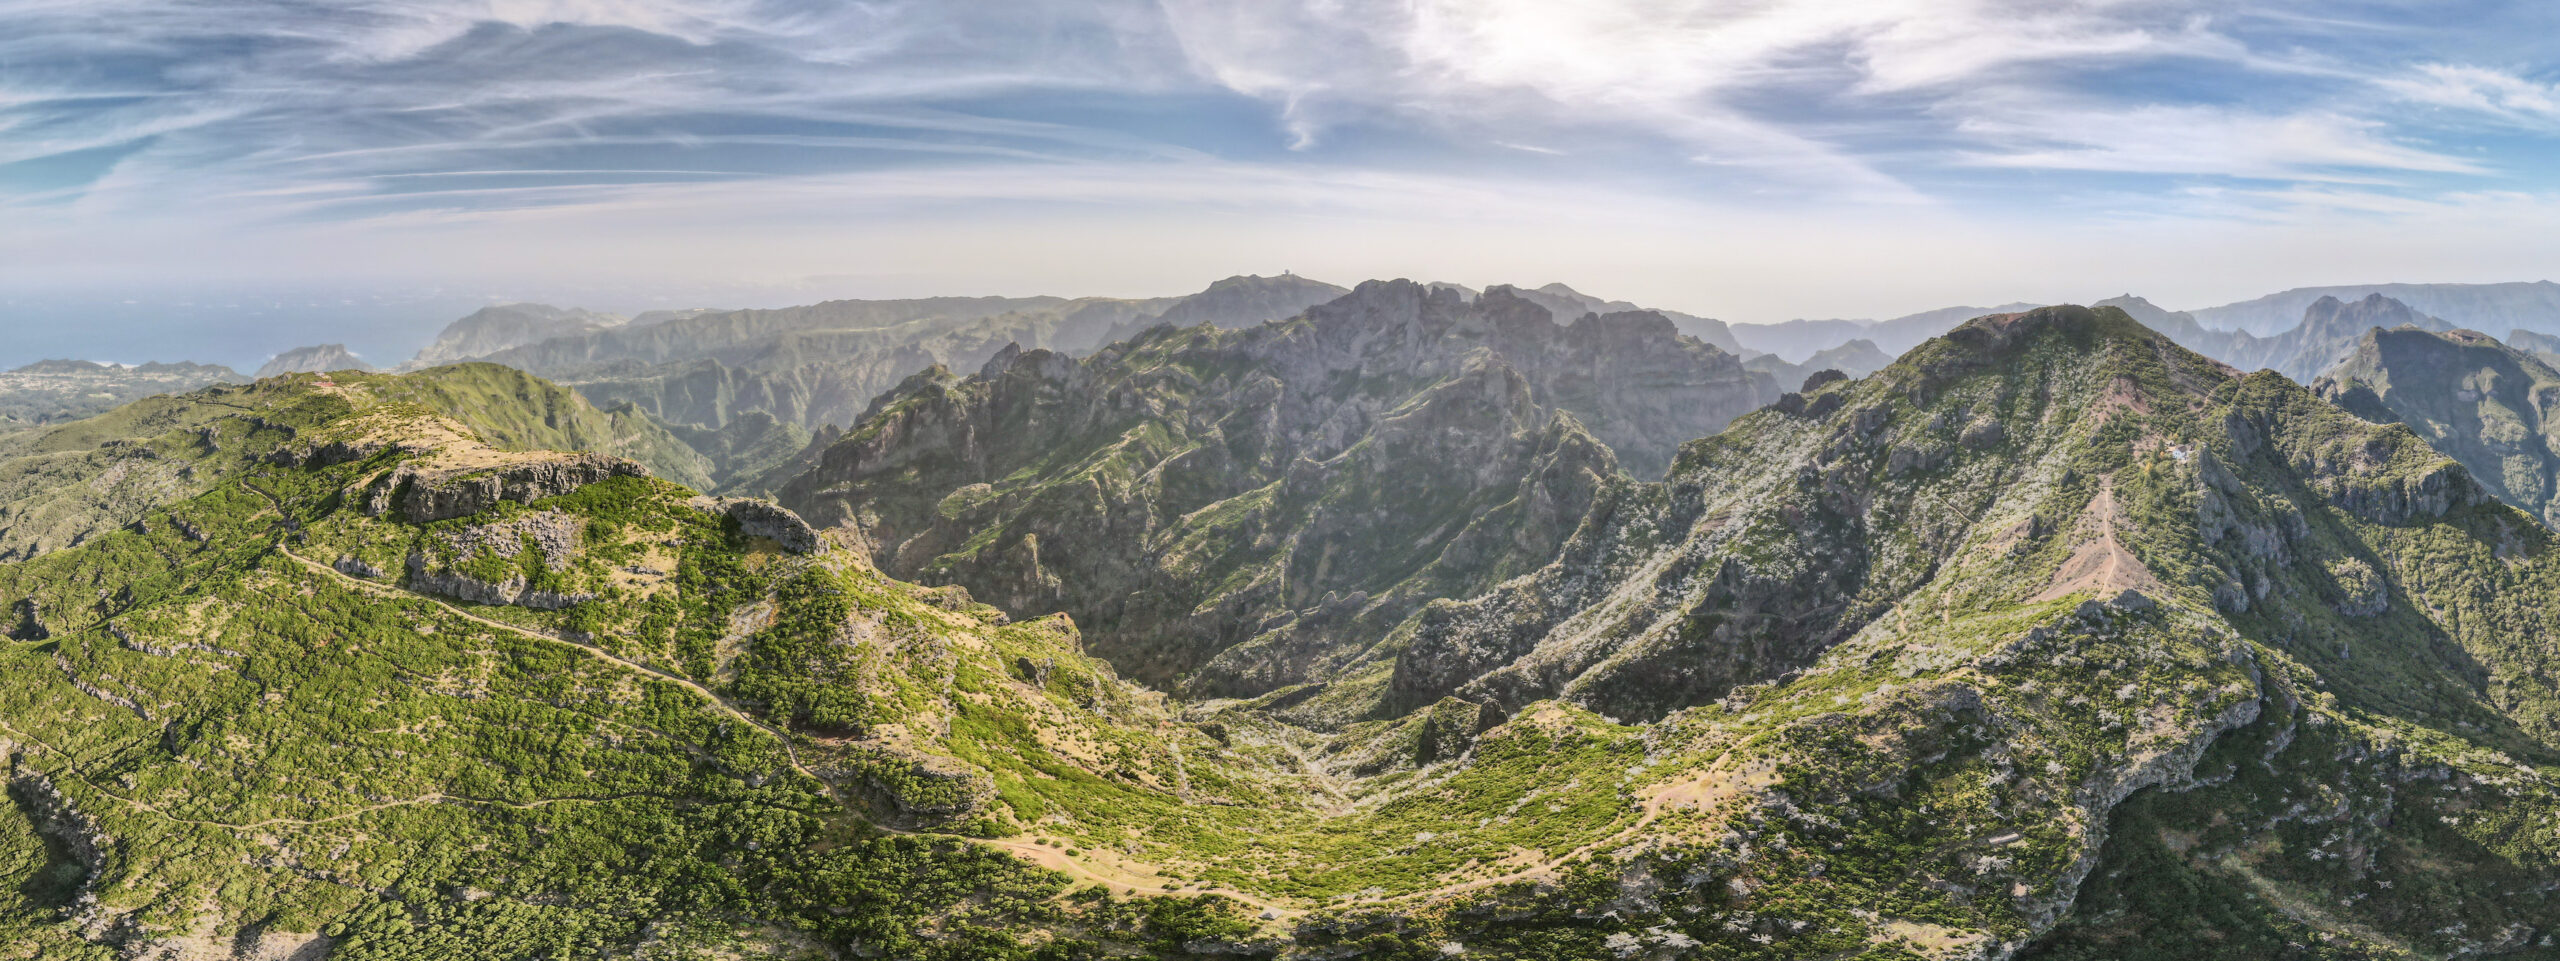
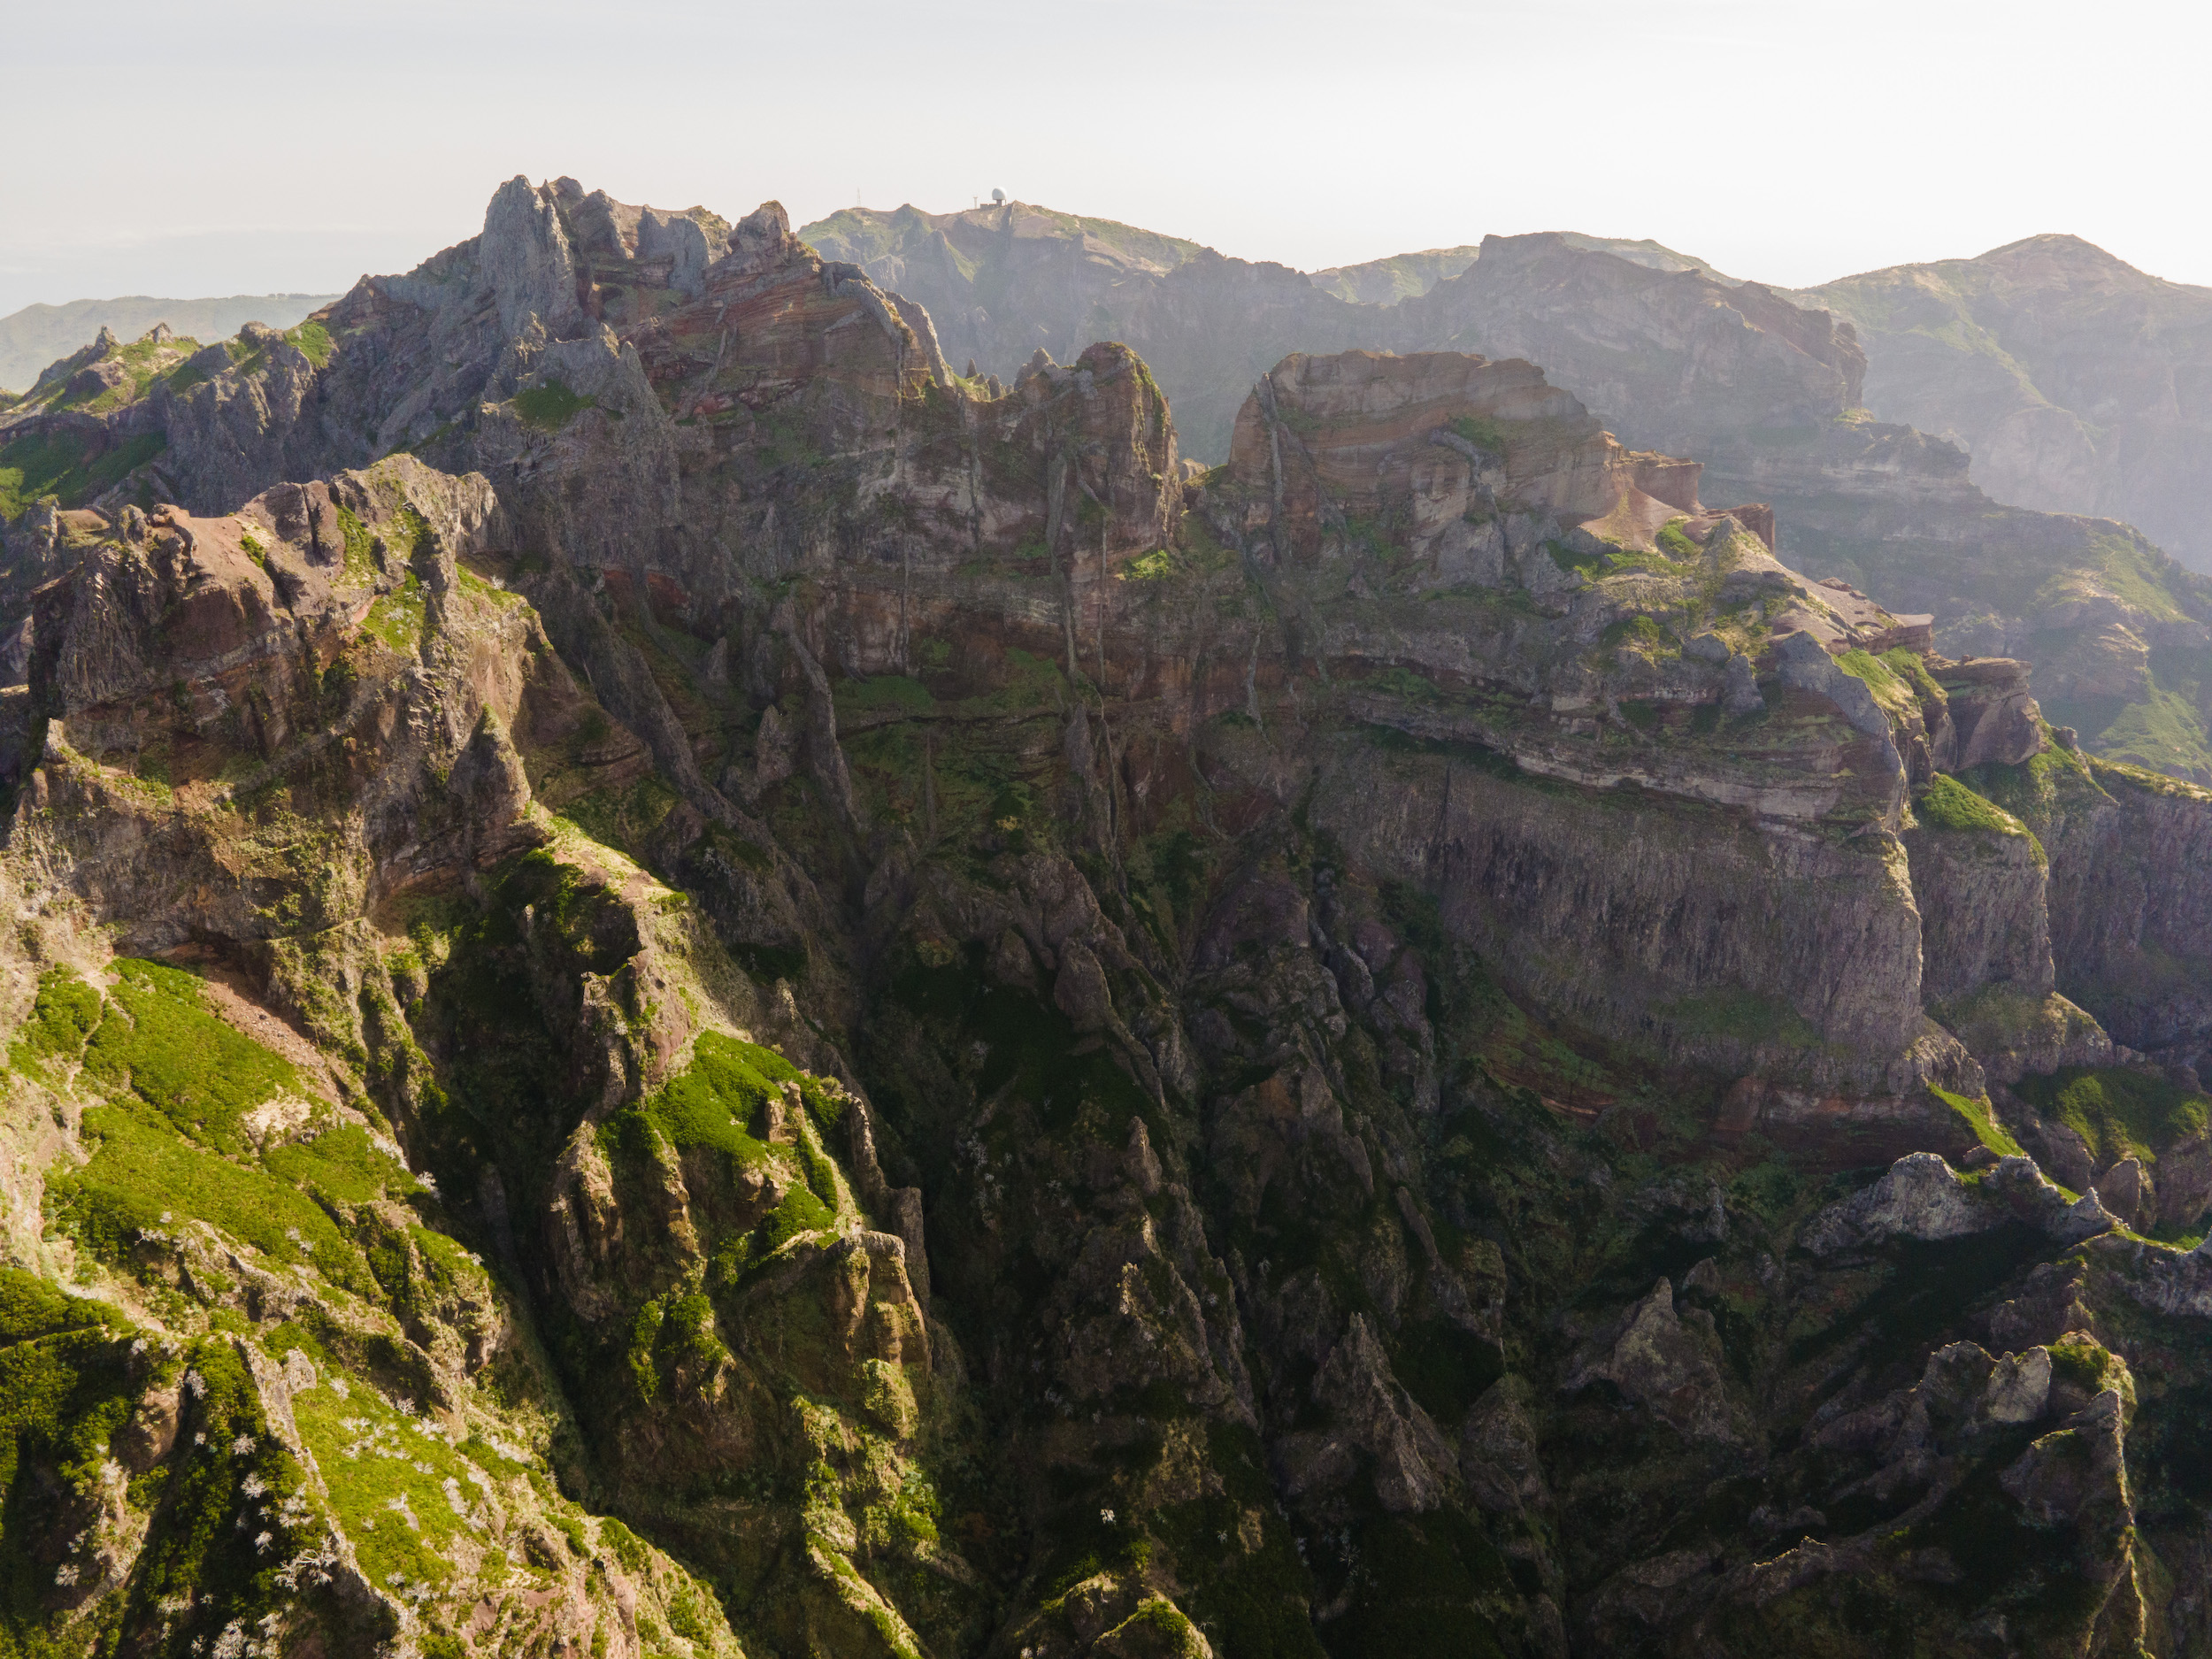
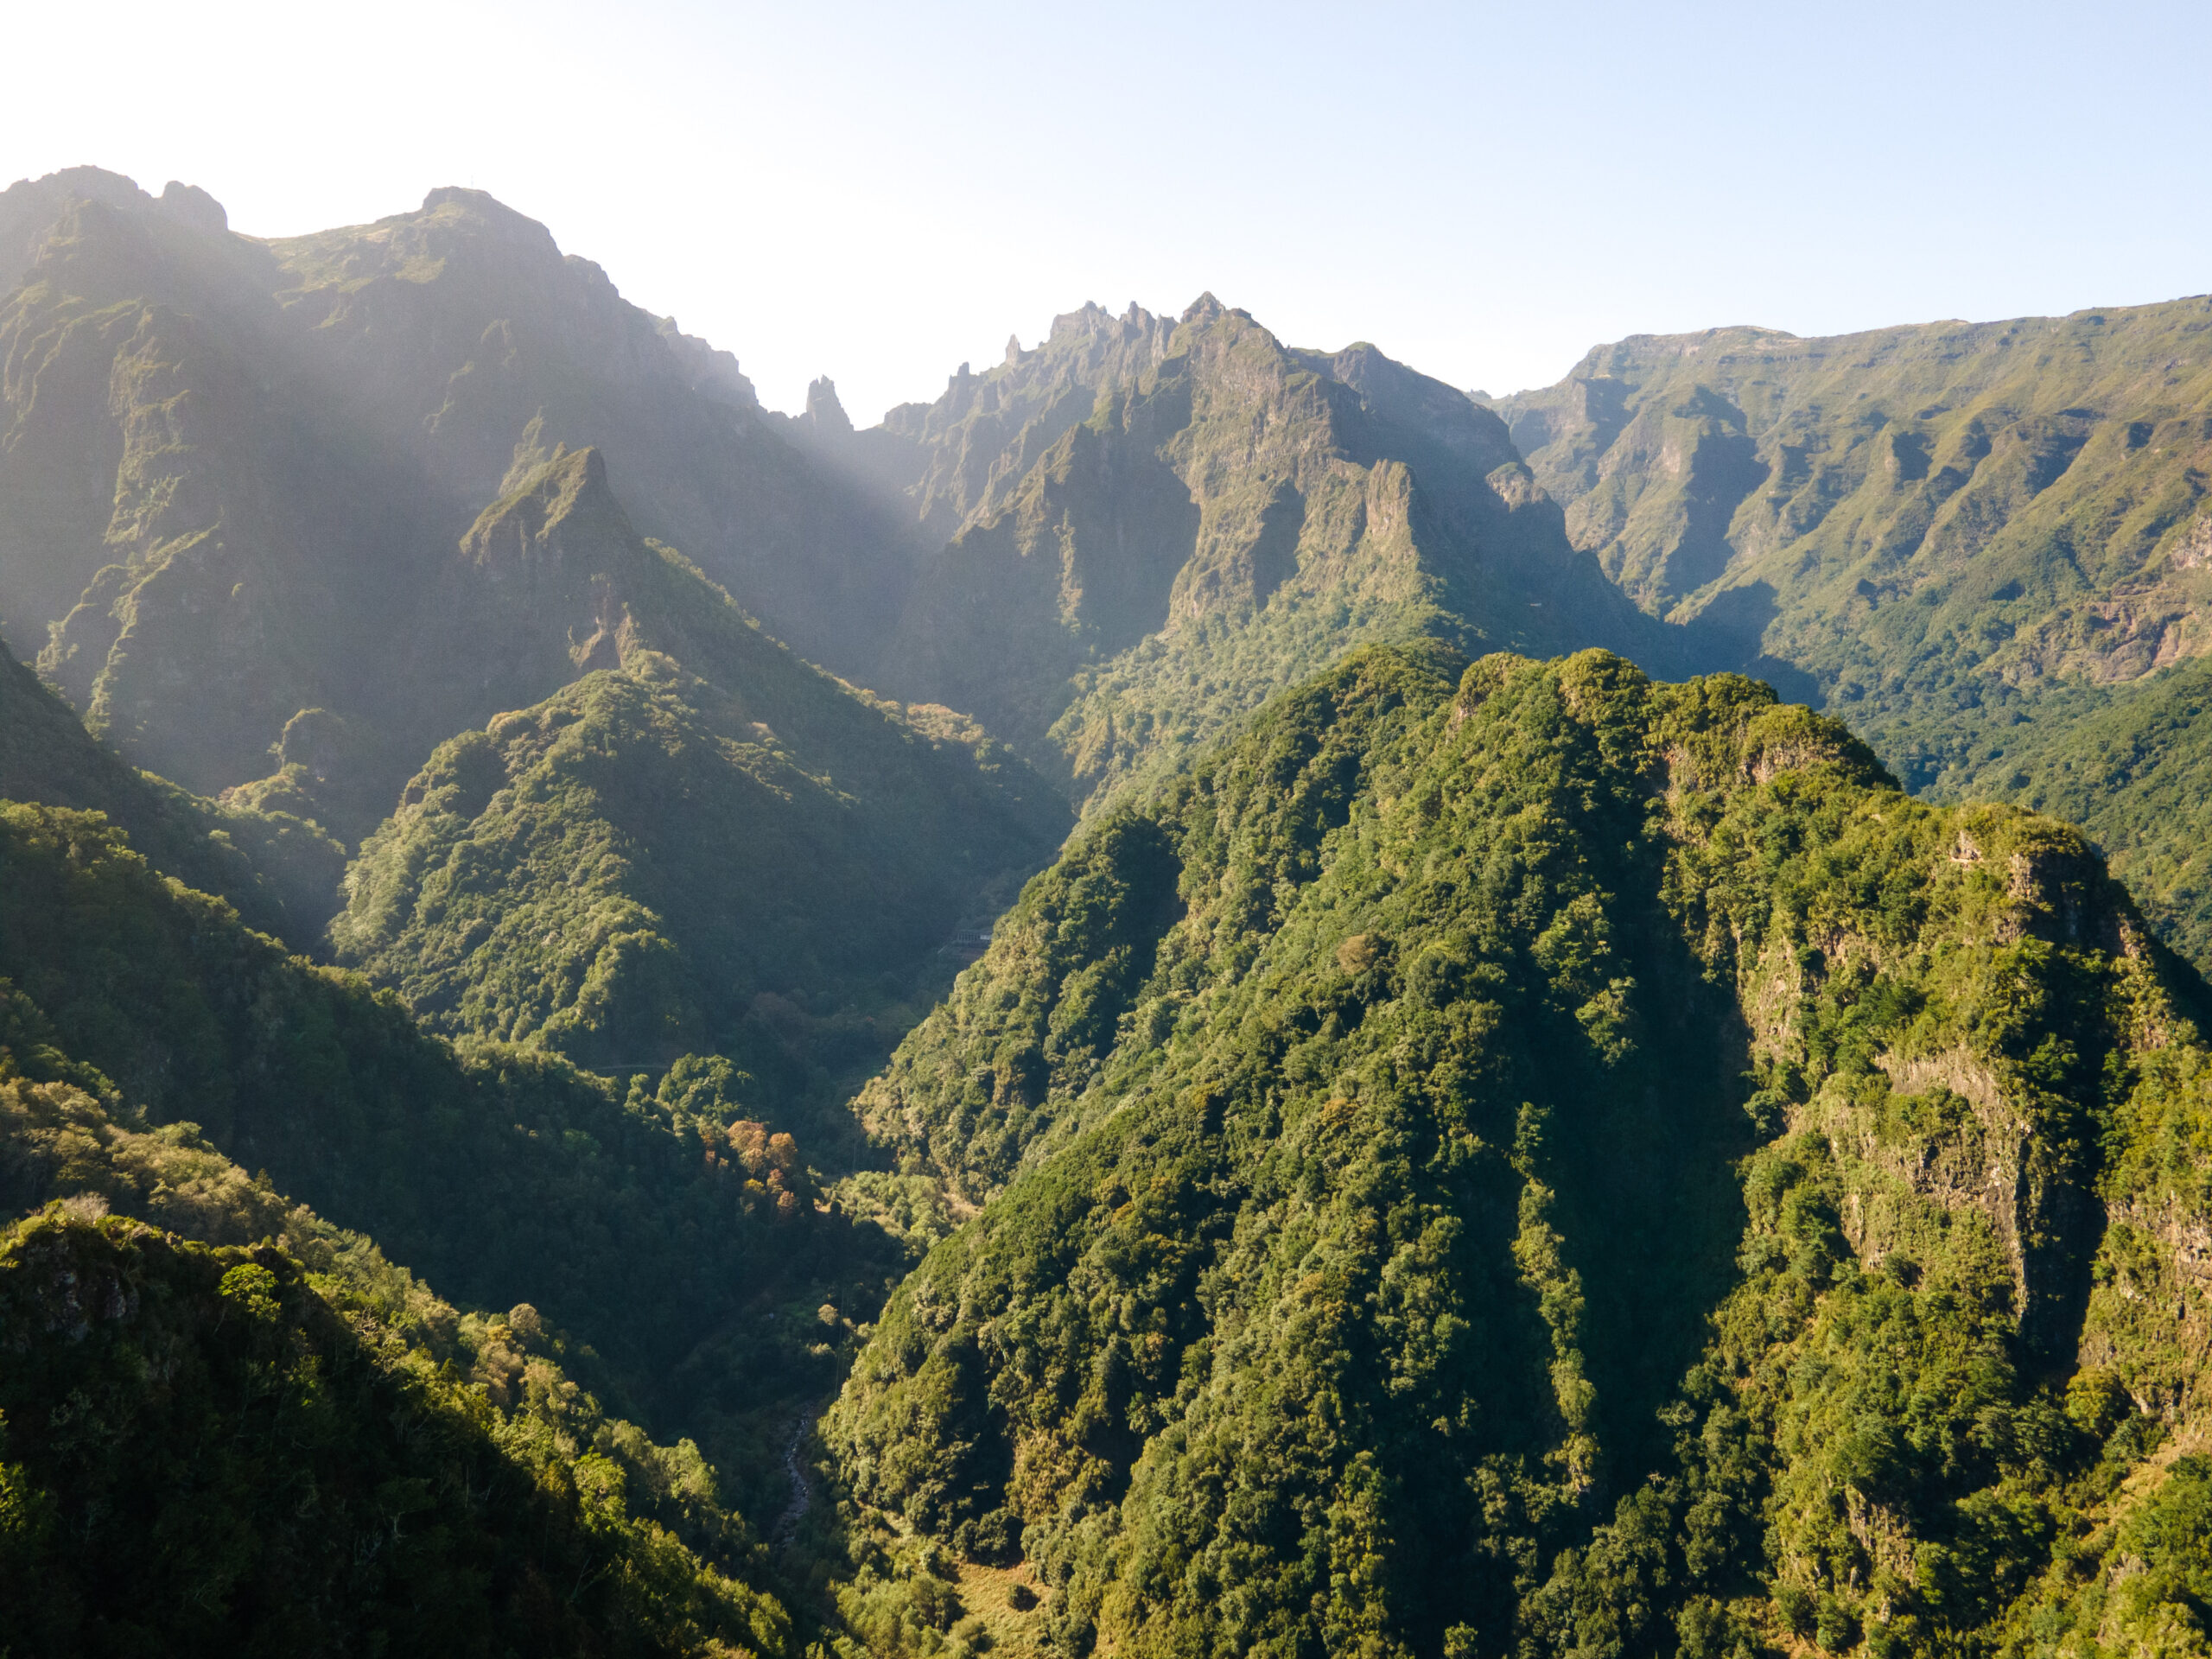
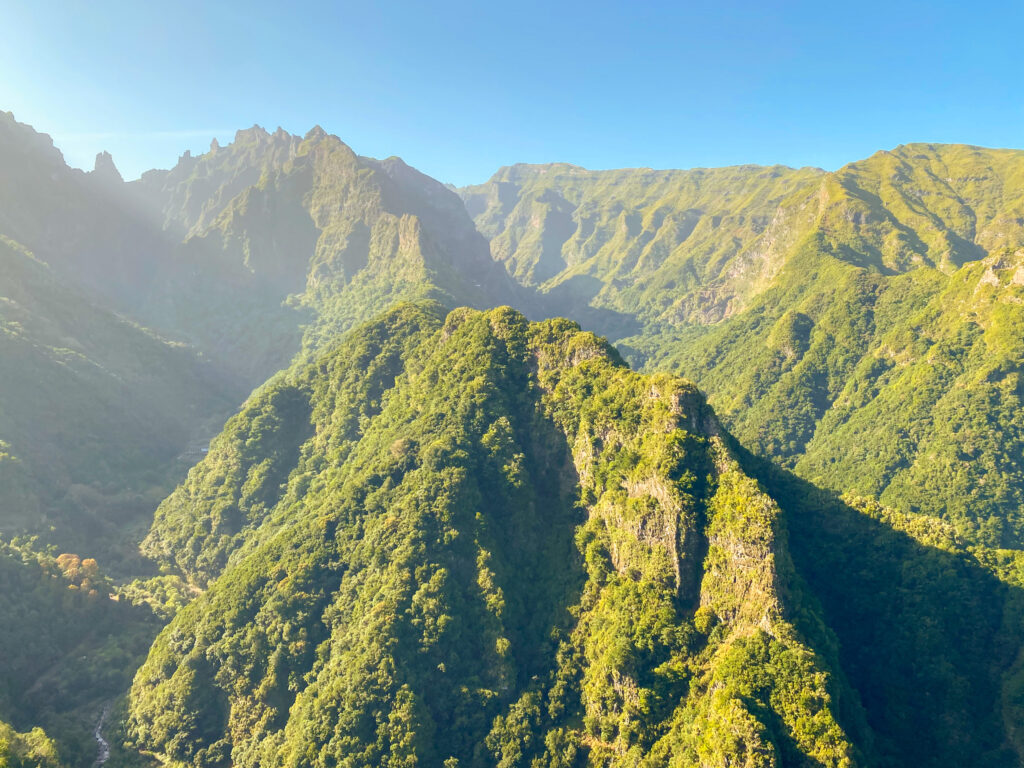
This challenging hike was amazing with breathtaking views and landscapes. It is often called the “Highest Peaks” trail as it covers 3 of the highest points of Madeira – Pico do Arieiro (1818m), Pico das Torres (1851m), and Pico Ruivo (1862m).
During more than half on the hike, you are hiking on the ledge of the mountain. However for the majority of the sections, you are walking along the mountain. So if you are afraid of the heights focus your eyes on this side instead of looking at the stunning views. There are plenty of spots where you can stop and enjoy the beautiful scenery.
Pico Ruivo and Pico do Ariero are the highest summits of Madeira. And getting from from one to the other on the PR1 hiking trail is one of the most difficult hike in Madeira. It is a very strenuous but epic hike with majestic viewpoints.
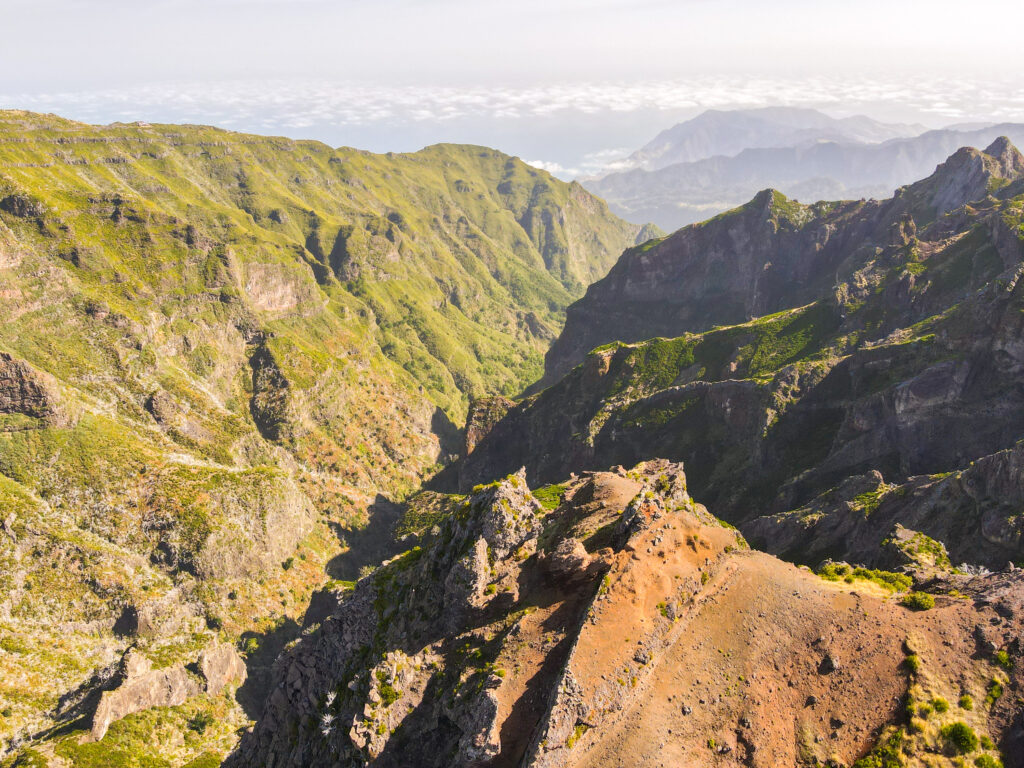
We hiked during a sunny and very clear day. Alexis was a little disappointed because we didn’t capture a very famous view where you get above the clouds. But at the top of the Pico Ruivo, it was perfect to enjoy a panoramic view.
The first highlight of the hike is Ninho da Manta (Buzzard’s Nest) about 15 minutes walk from the beginning of the trail. It is mostly downhill to get there and you get an amazing panoramic view of the island.

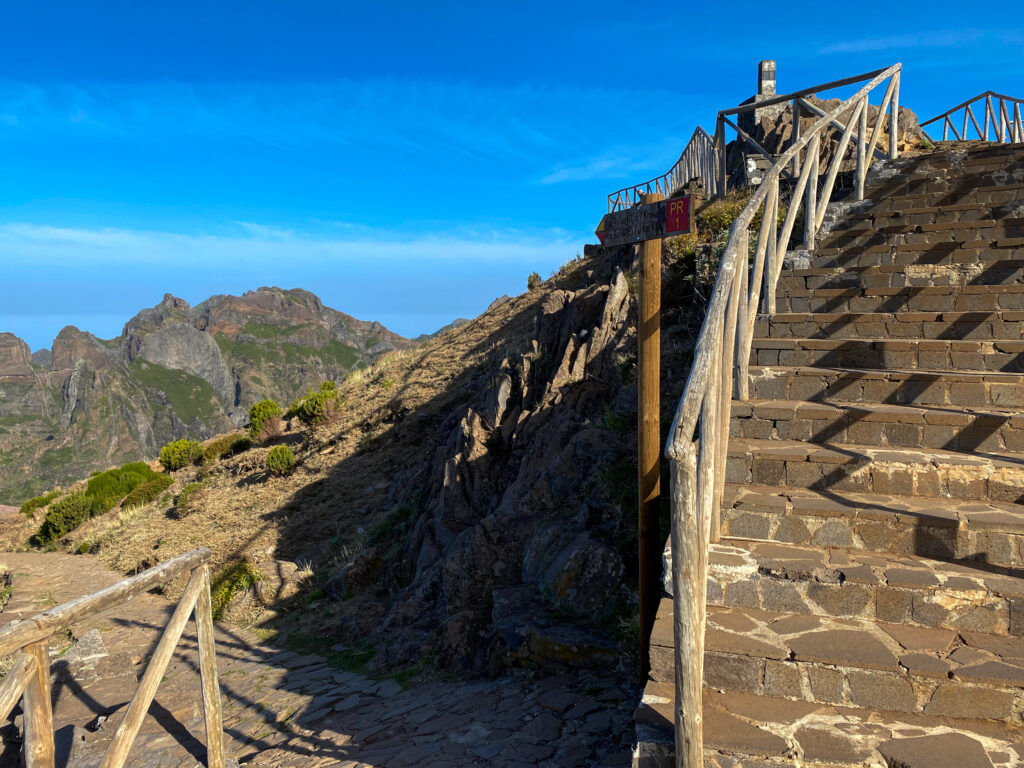
If you have vertigo or have fear of heights, you will not be a big fan of the next small section. Only a few minutes after the previous viewpoint, there will be the scariest moment of the hike and can be quite challenging.

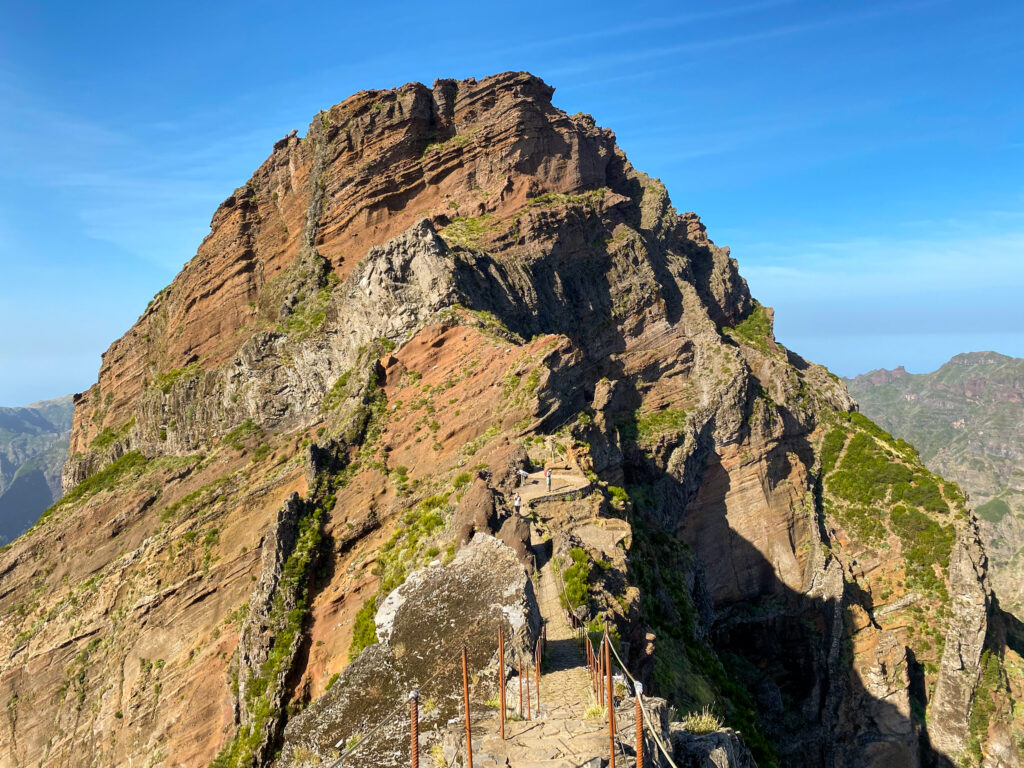
You are walking on a ledge of the mountain but there are iron handrails on both side of the mountain. So it is pretty safe. If you have trekking poles, put them back on your bag before this section so that they don’t disturb you. Note – we found the trekking poles not useful at all for this hike. On the opposite, with the stairs and ladders, it is better without them.
Luckily this scariest section lasts only a few minutes. I was not really confortable but the good news, is that on our way back, my fear almost disappeared even on this section. It is much easier when you are going up rather than going downhill.

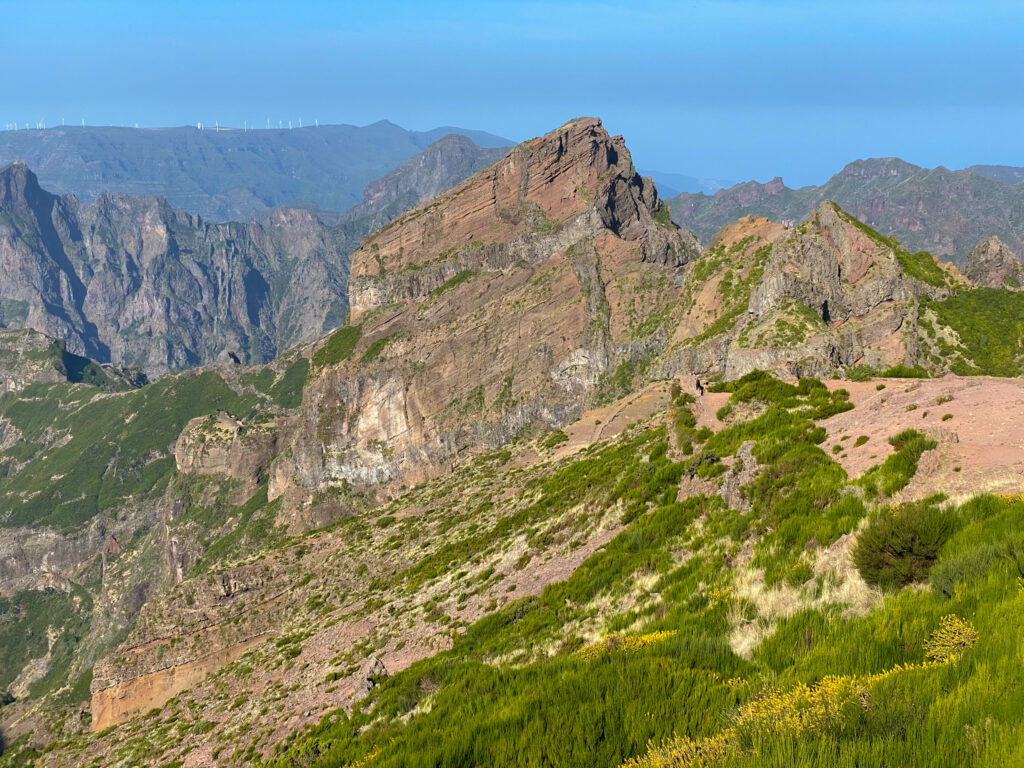
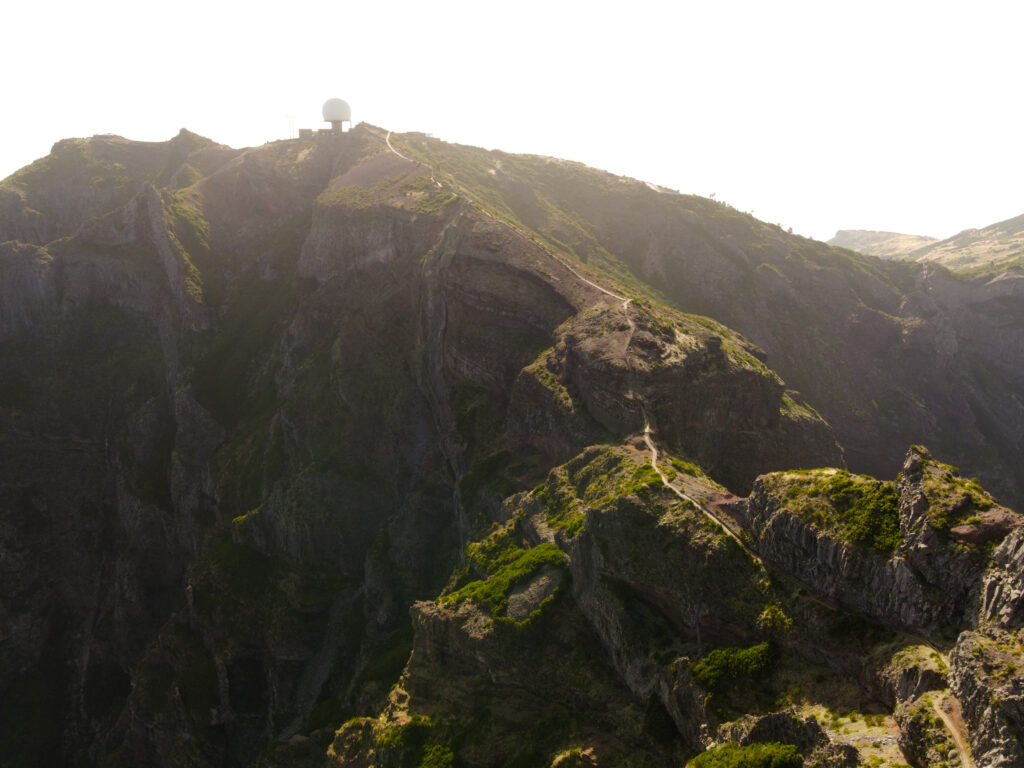
Then the hiking trail continues for a long and exhausting path up to Pico das Torres. There is a lot of stairs going down, then going up.

Finally, the last peak is the ascension up to Pico Ruivo.
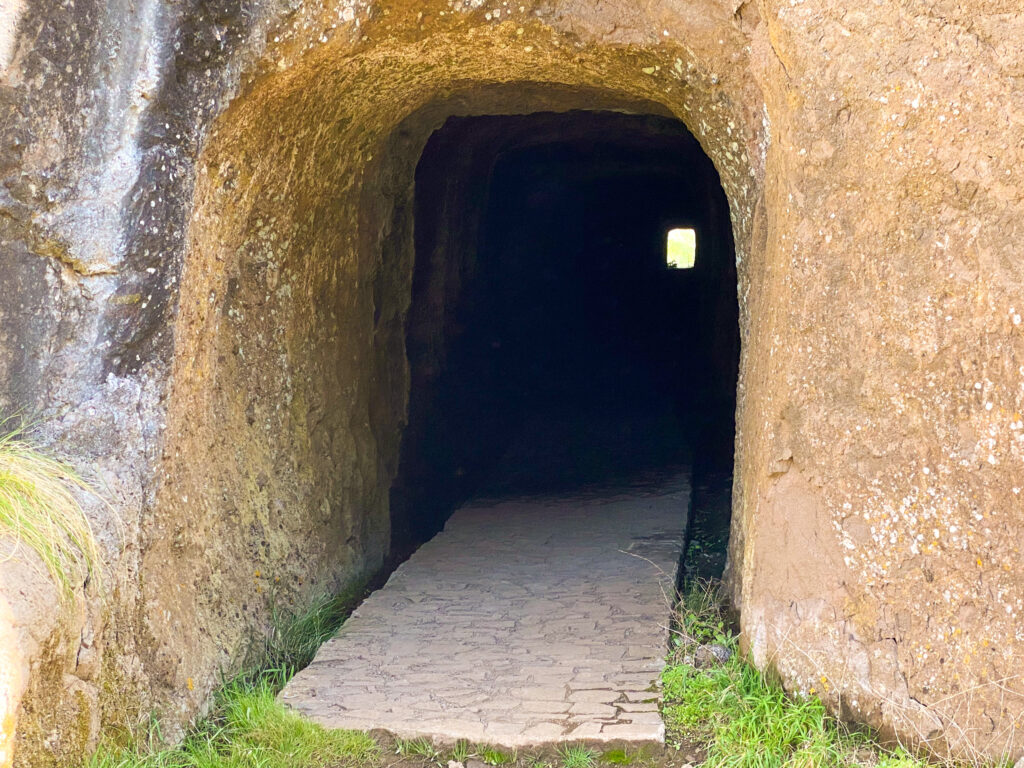
Along the way, you will experience hills, stairs, tunnels (don’t forget to take a lamp), downhills and rock formations. And of course, you will be stunned by beautiful landscapes.


Finally, try starting the hike quite early. The way up the Pico Ruivo is long. In the peak season, the path can get quite crowded. We hiked in November, so we didn’t face this issue.
At the end of the hike, I bet you will be exhausted ;). The main reason is that you are climbing 3 summits on this PR1 trail. Hence you are going up to the peak and then down the mountain with the opposite road on your way back. The altitude difference between the starting peak up to the third one is quite small but there are constant changes in the altitude along the way!
In total, it took us about 5 hours to complete the full trail including all the breaks. Of course, your completion time will depend of your training level. We are not advanced hikers but we love outdoors and hiking. We rate this hike as challenging but not impossible! What an amazing day :). We were delighted with this epic hike.
Trail brochure
See below the official brochure of this road

2. Verada da Ponta de São Lourenço – PR8
Key information on the hike
Our recorded data
- Distance – 7.6km (both way)
- Average time – 2h30 (both way)
- Elevation gain – 770m
- Starting point – Ponta de São Lourenço parking
- Route type – Out & Back
- Difficulty – Moderate
- What to bring and what to wear? – wind jacket as it can be really windy, hiking shoes, sunscreen, 1.5L water minimum, snacks or lunch – though there is a cafe midway if you don’t bring any.
Our experience
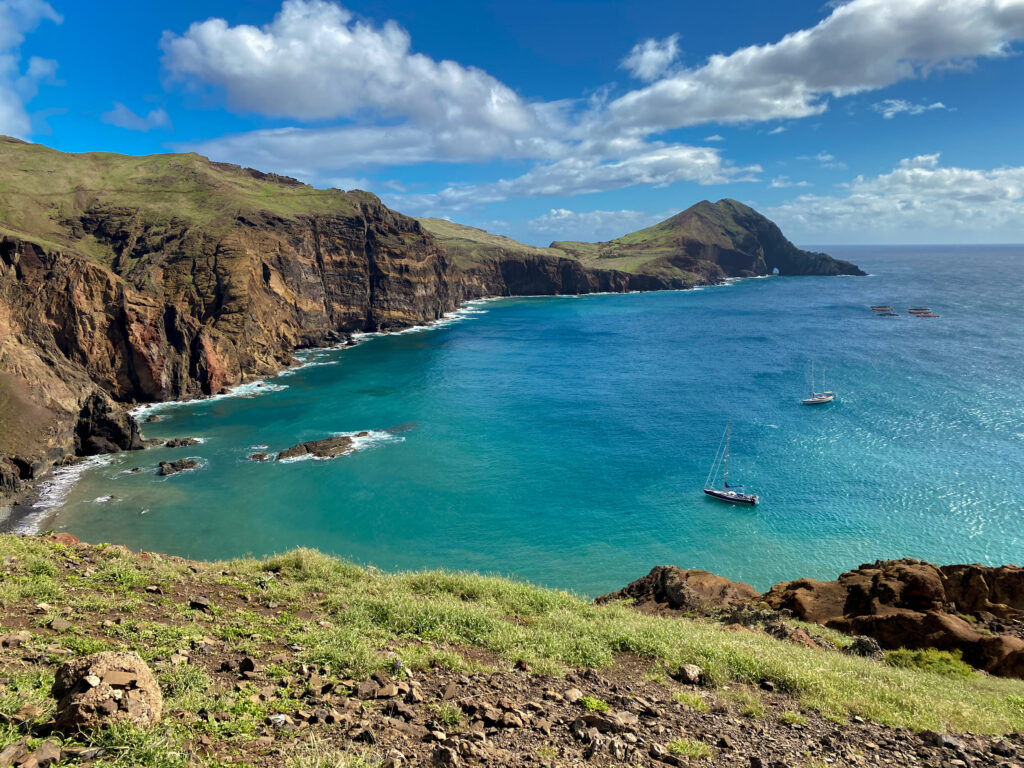
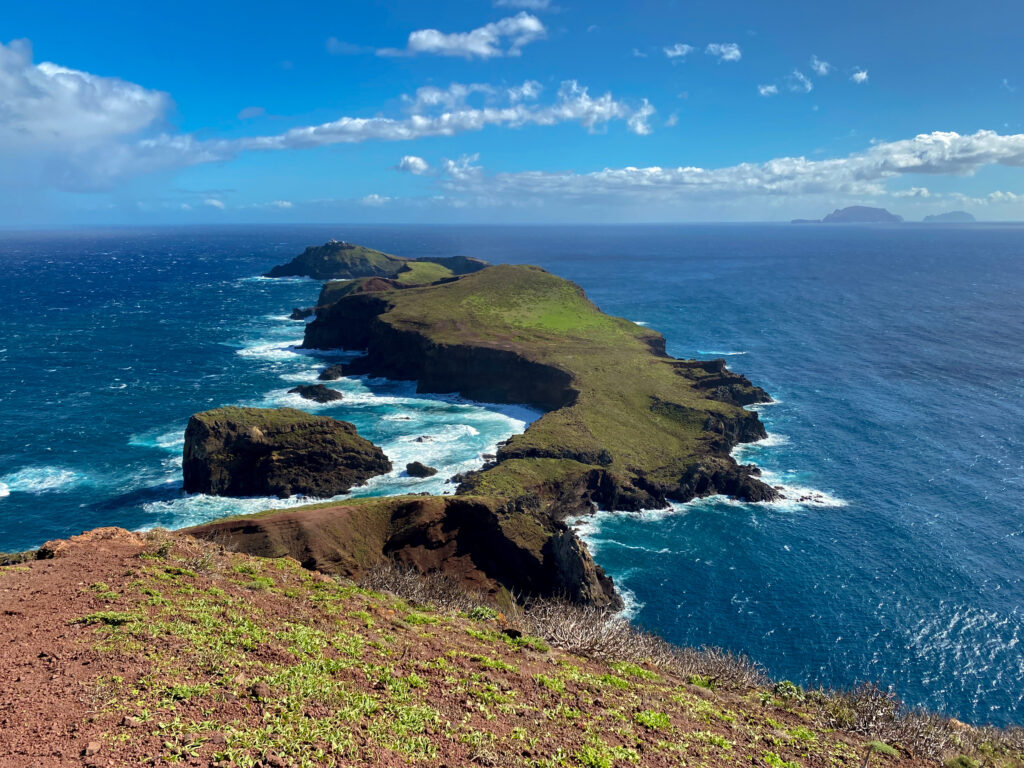
Without hesitation this is hike is my second favourite one. The hike along the Eastern peninsula offers incredible breathtaking and unique views! This coastline hike is completely different from all the other hikes of the island and is very popular.
Along the hiking trail, you can pretty much stop at every corner to enjoy scenic views and take some pictures. The peninsula is a beautiful route with amazing orange / red rock formations. We were completely stunned by the spectacular views along the way.
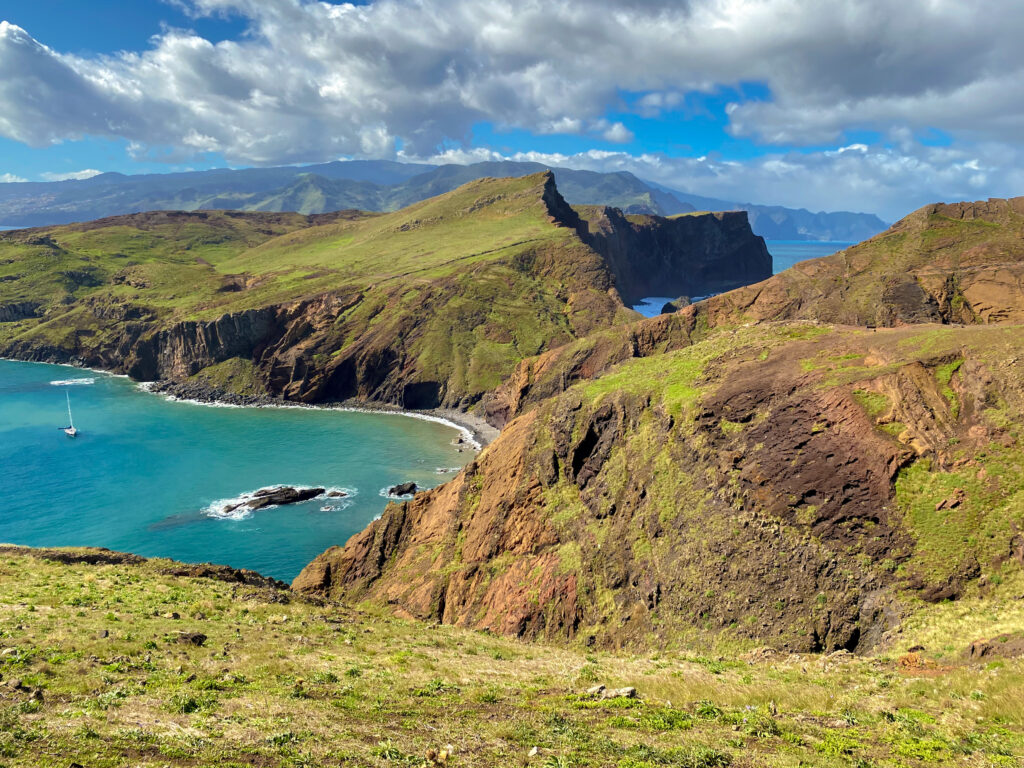

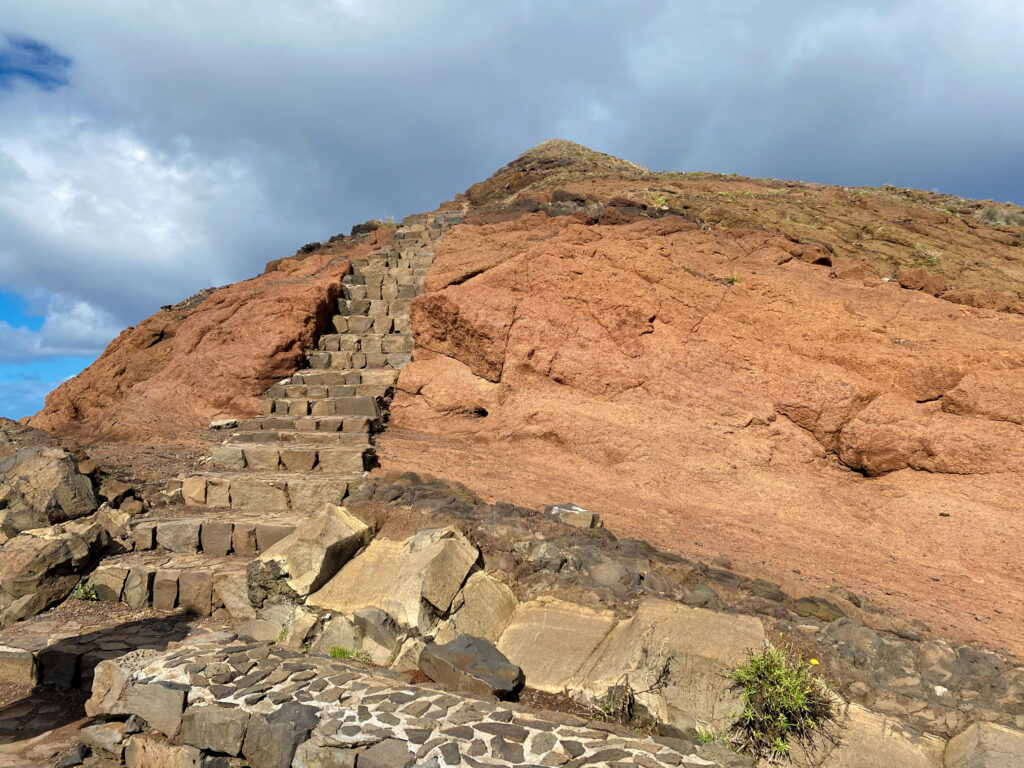
The official trail stops near by a cafe. The last part is not part of the official trail but most of hikers climb up to the summit called Pico do Furado. It would be a pity to miss that last part! We highly recommend you to climb the final stairs up to a panoramic postcard view :). The view is literally breathtaking!
The footpath is really straight forward, you can’t get lost! It is rocky and essentially gravel track or paved steps. For the most complex part of the road, there are rope barriers or railings to assist you. We hiked in the middle of the day, but I read that it is a pretty amazing hidden sunset spot in Madeira.
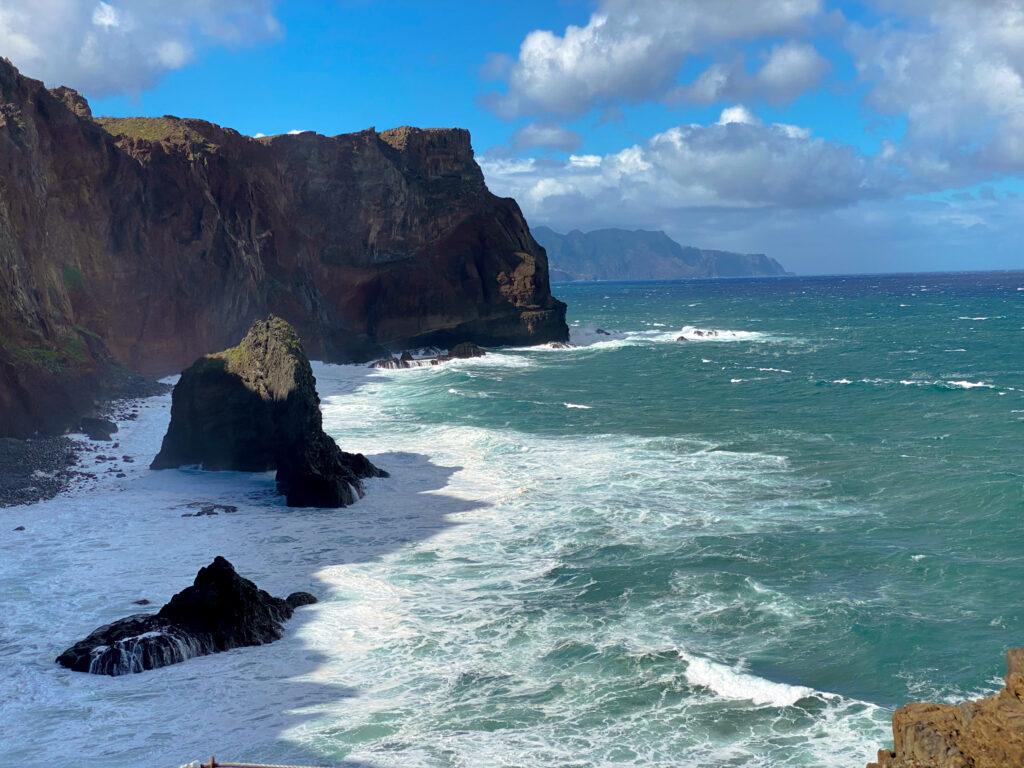
One main advice – don’t underestimate the wind. There can be a veery strong wind along the peninsula. It almost push you out of the path. If you have a drone, you might not be able to fly it there as it is way too windy.
Trail brochure
See below the official brochure of this road

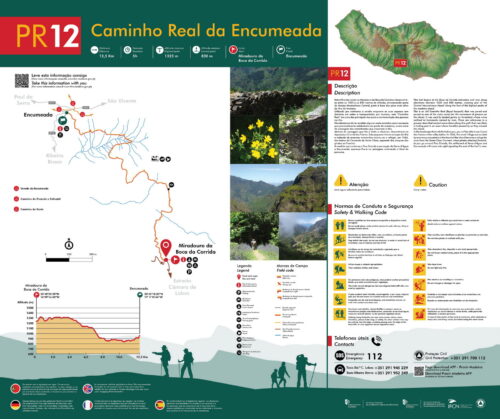
3. Caminho Real da Encumeada – PR12
Key information on the hike
Our recorded data (partial hike)
- Distance – 7km (both way)
- Average time – 2 hours (both way)
- Elevation gain – 250m (both way)
- Starting point – Boca da Corrida viewpoint
- Route type – Out & Back
- Difficulty – moderate
- What to bring and what to wear? – raincoat, hiking shoes, trekking poles, 2L water, snacks or lunch
Our experience
This hike is probably the less popular among our list but we highly recommend it. It is the last one of our top 3 hikes that we absolutely recommend to do during your stay in Madeira :).
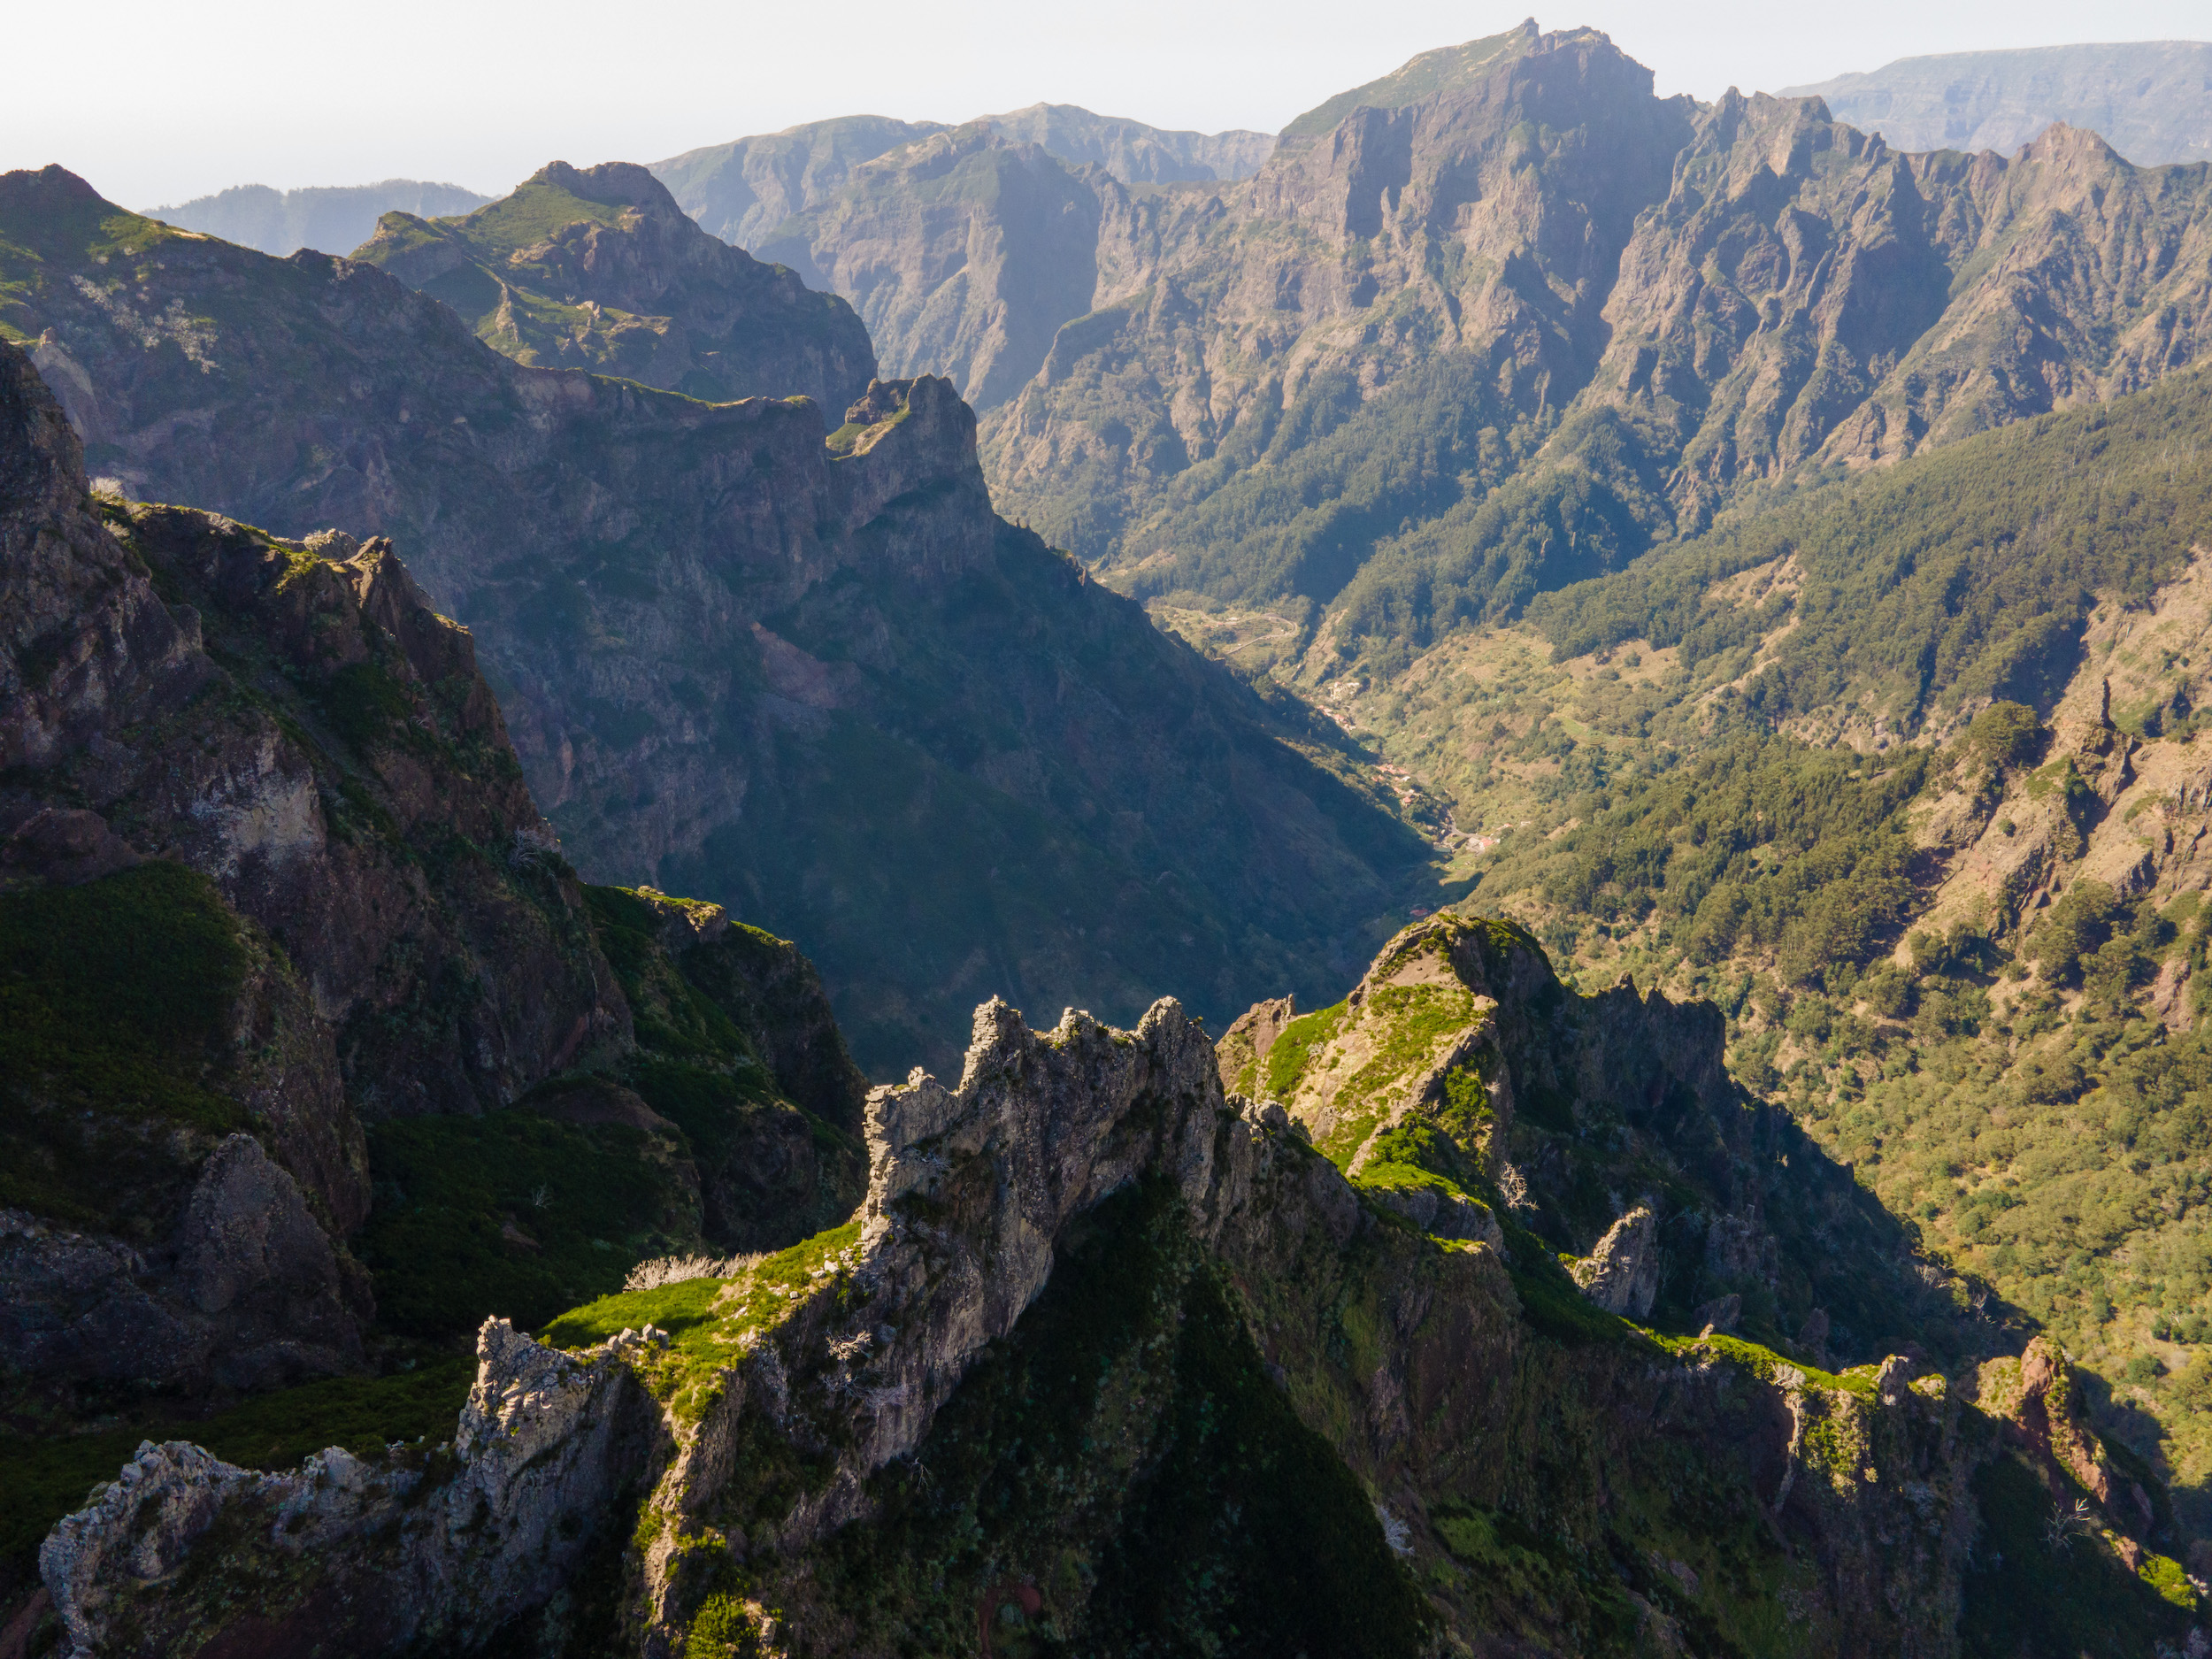
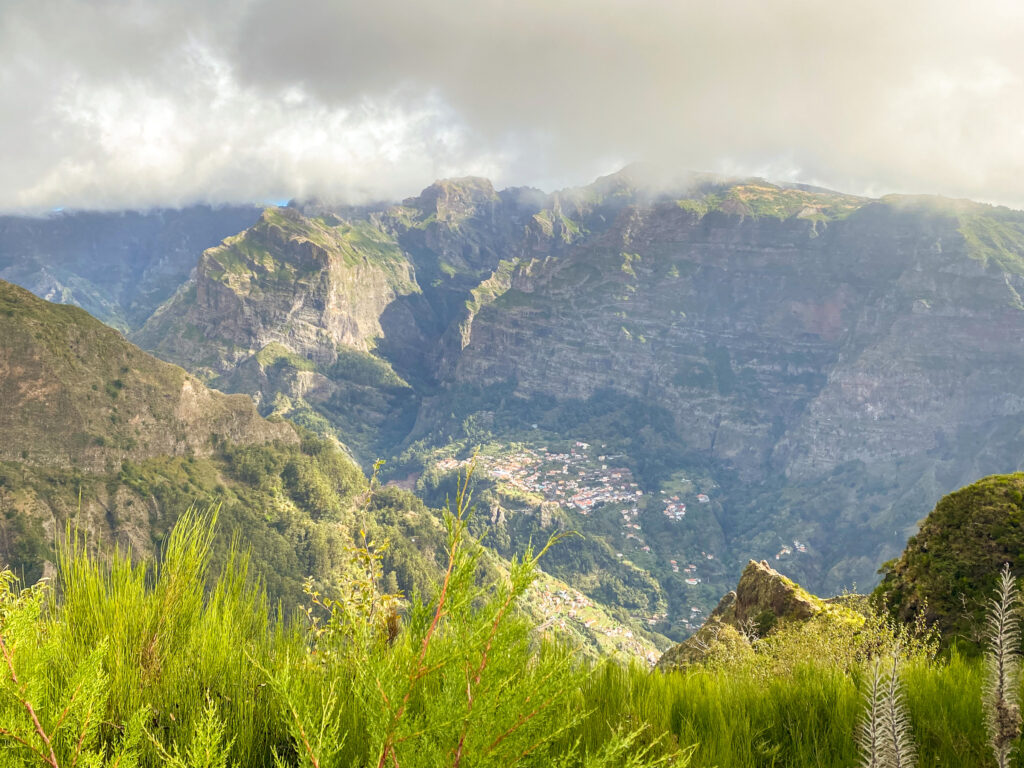
The Boca da Corrida viewpoint at the starting point is already stunning. Along this hiking trail, you can enjoy majestic views on different mountains peaks, with the main highlight – the Pico Grande.
The walking path changes frequently. You will alternate between paved route, stairs, descents and climbs. Along the way we also enjoyed a nice view on a small village along the Curral das Freitas (Nun’s valley).
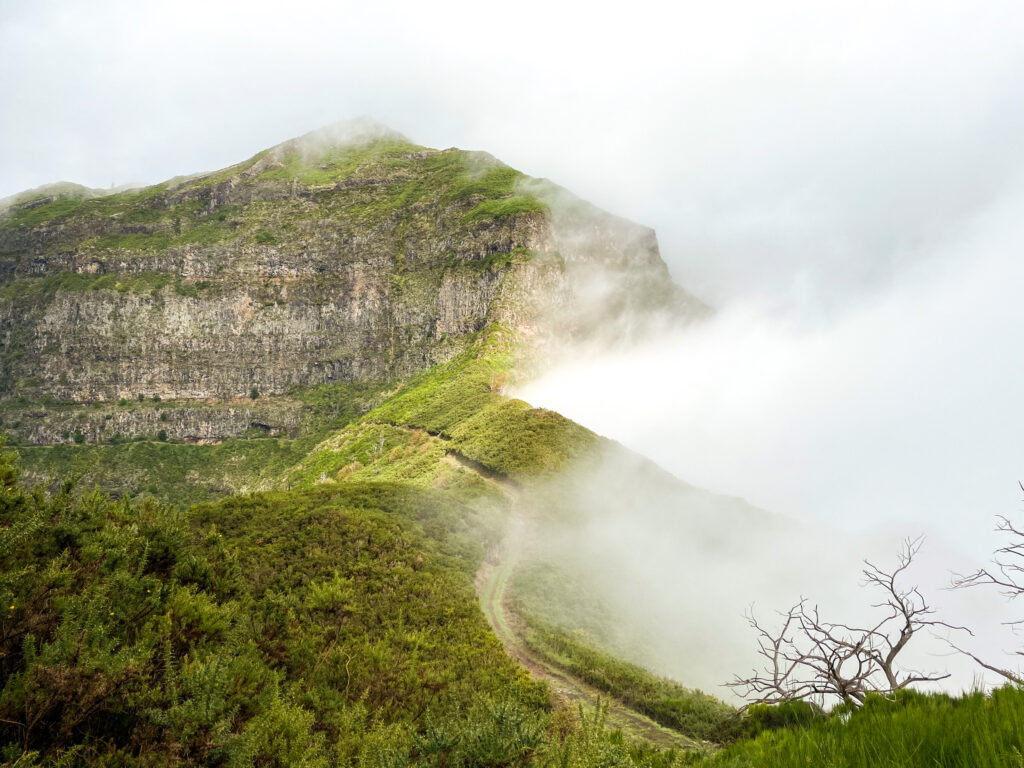
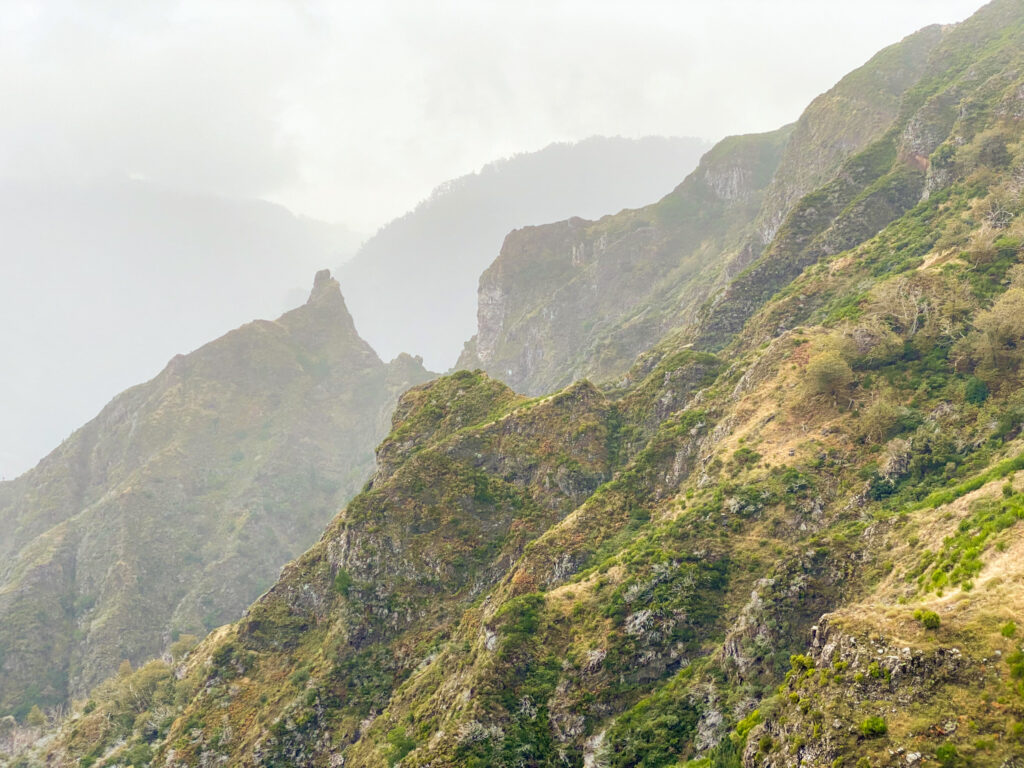
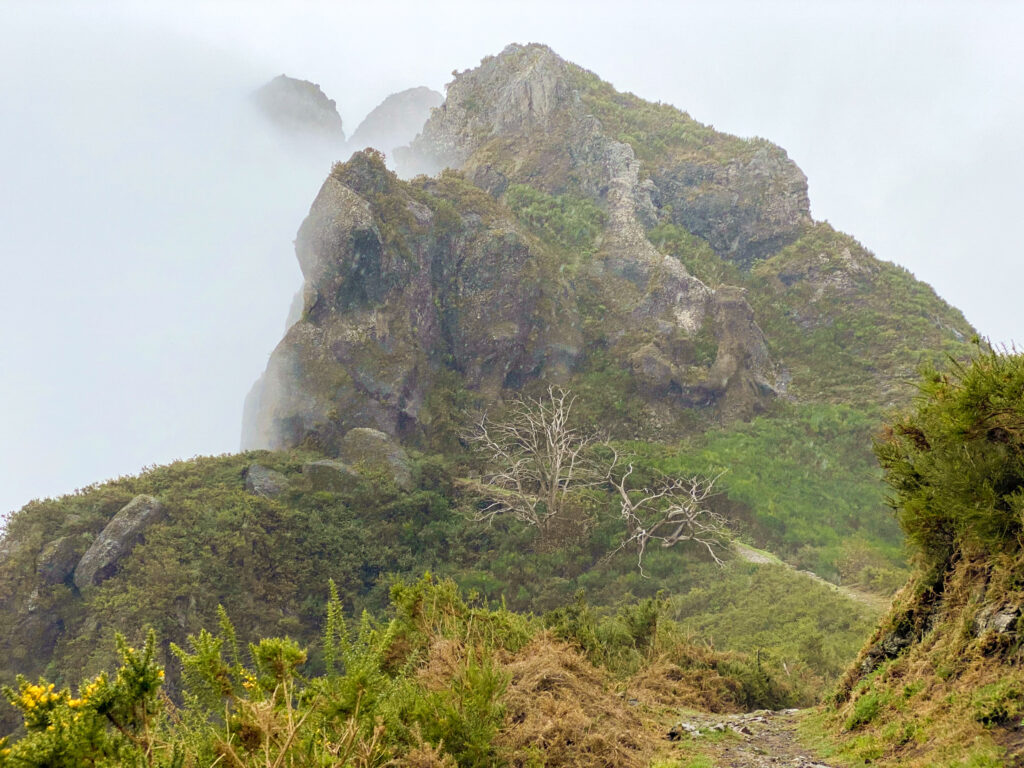
As you can notice on our photos, the weather was cloudy with mist. We also got wet several times ;). So we decided to stop the hike at about a third of the walking path. At that time, we were pretty much surrounded by the clouds!
Before the clouds completely obstructed the visibility, we flew our drone so close to the clouds and we managed to get pretty cool cloudy pictures on the mountains.
Trail brochure
See below the official brochure of this road –
4. Verada dos Balcões – PR11
Key information on the hike
It is a perfect hike for families with kids. Or if you don’t like hiking for hours to get a nice view!
Our recorded data
- Distance – 1.5km one way
- Average time – less than 30 minutes one way
- Starting point – ER103, Ribeiro Frio
- Route type – Out & Back
- Difficulty – Very easy
- What to bring and what to wear? Sneakers, water, snacks
Our experience
This walk is one of the easiest and the shortest hike to get a very amazing view ;). However, it is still a popular walk as the view of the mountain peaks is gorgeous. You can enjoy this panoramic view in less than 30 minutes! The length of the path is 1.5km each way.
The footpath is very easy and flat. You will quickly arrive at the view point. We arrived there at lunch time, it was a perfect picnic spot!
The trail follows the Levada da Serra do Faial. Levada walks and hikes are very popular in Madeira. Levada is a Portuguese word, which means “carry”. It is a mini-canal used as an irrigation system to distribute water from rainfall Northern area of the island up to sunnier and drier regions to the South of island. The Levada walks are the maintenance paths beside the Levadas. Initially used for agriculture, it is now also used as a playground by tourists to enjoy beautiful hikes.

5. Verado da Fanal – PR13
Key information on the hike
Our recorded data (partial hike)
- Distance – 10km (both way)
- Average time – 3 hours (both way)
- Elevation gain – 450m (both way)
- Starting point – Paul da Serra plateau along the E.R 209 (or Faial Parking if you take the hike in the other way)
- Route type – Out & Back
- Difficulty – moderate
- What to bring and what to wear? Hiking shoes, trekking poles, 2L water, snacks or lunch
Our experience
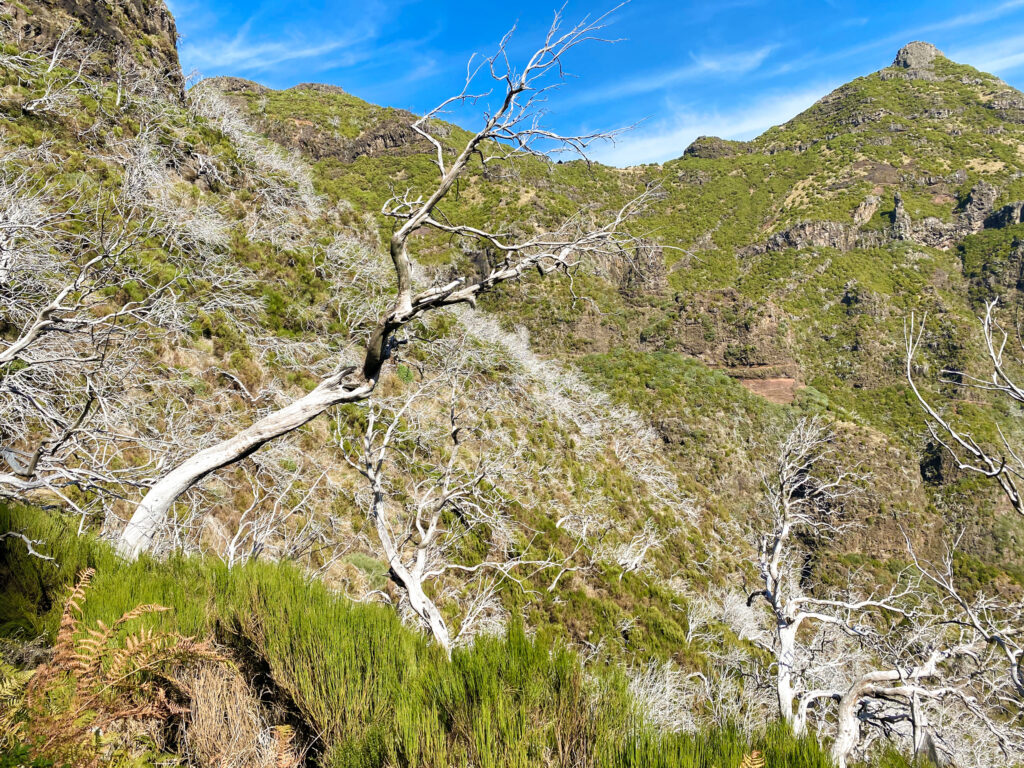
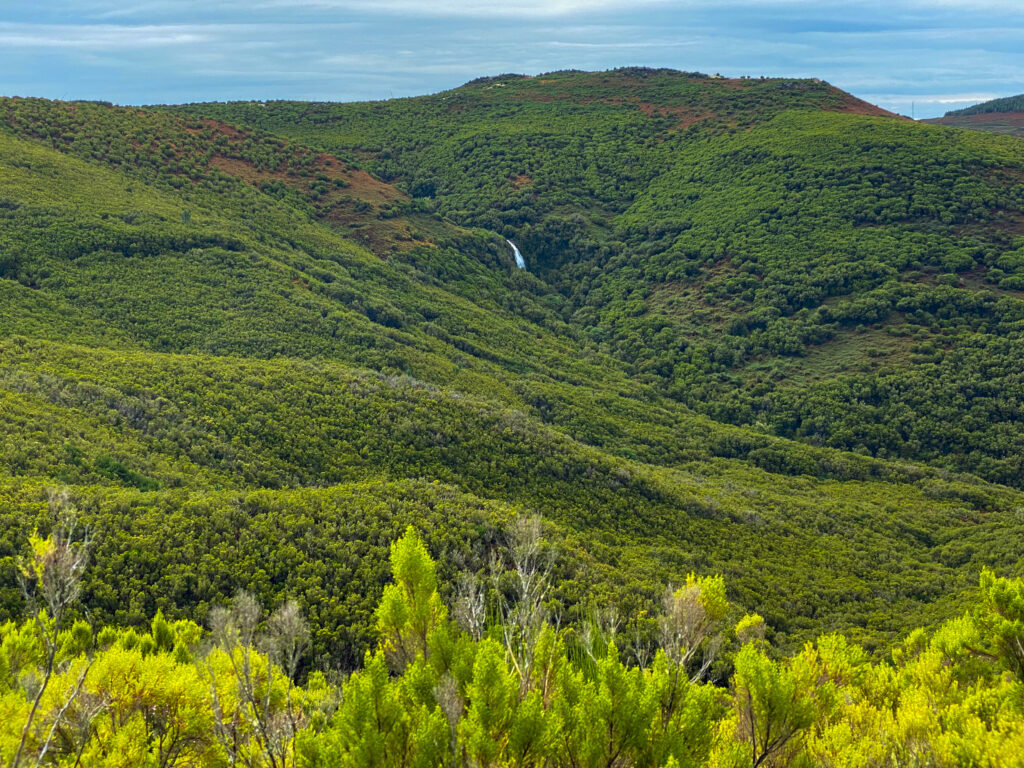
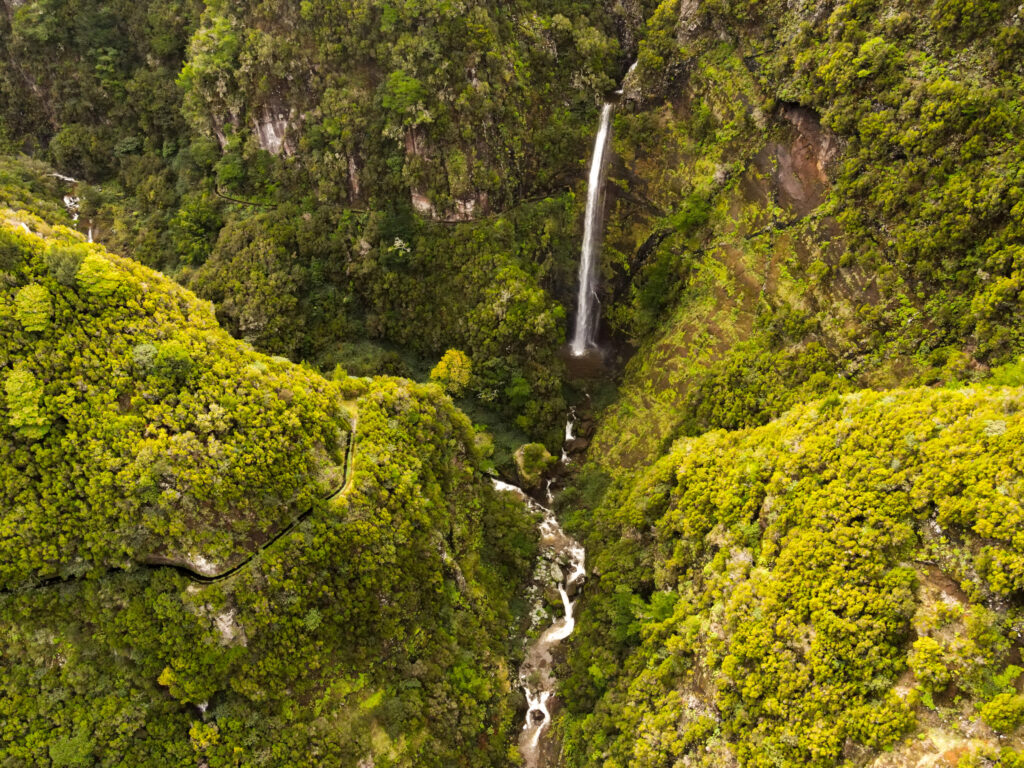
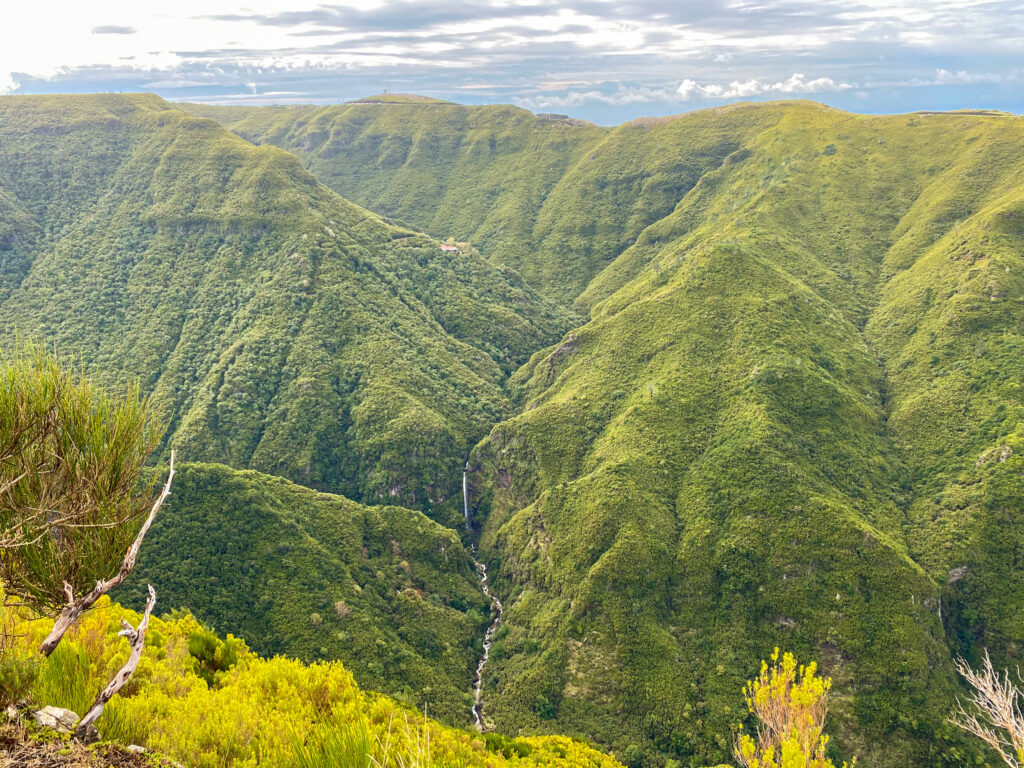
This hike is popular due to several viewpoints over the Rabacal Valley but even more for the immersive experience in the UNESCO-listed Laurisilva Forest! We chose to begin the hike downhill so we started at the plateau of Paul da Serra.
The first part of the hike is essentially inside the forest and hence in the shade. So it can be a perfect hike to choose if it is warm. After about 4 kilometres, we discovered the main highlight of the hike – a panoramic view into Rabacal. We decided it was a perfect spot for our picnic with a nice view as a background. From there, we could spot a couple of waterfalls and identify some hiking trails.
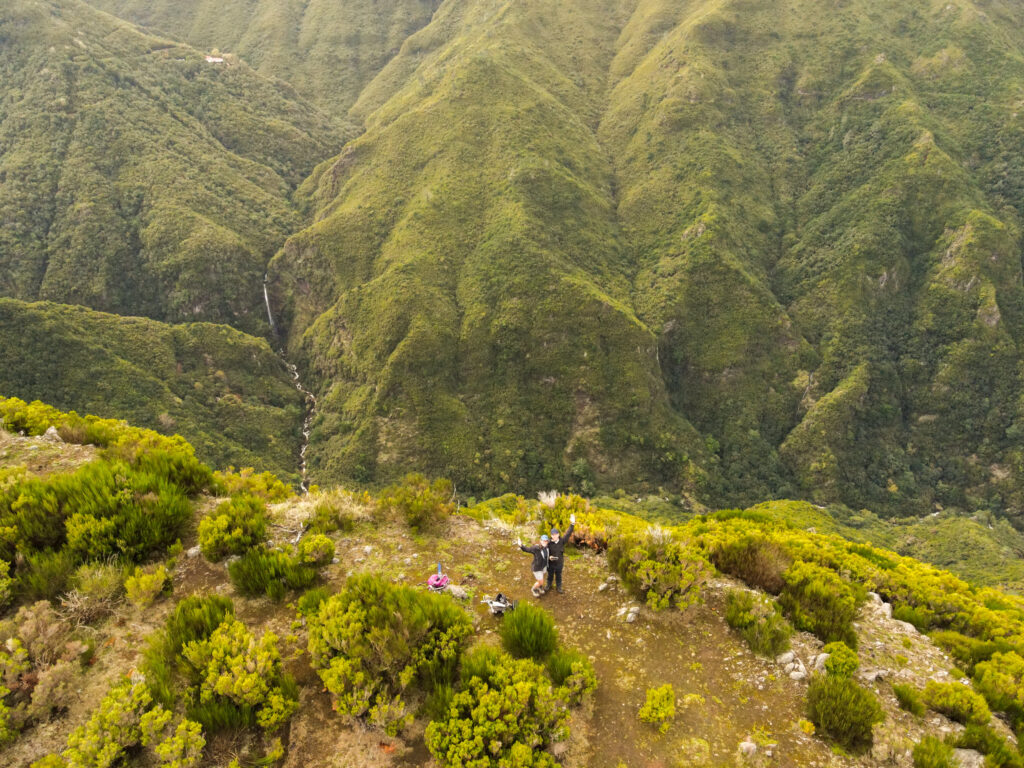
We stopped at about half way as the weather was not great and it started raining. However, we read that the end of the walk is spectacular with the magical Fanal Forest. One tip, if you don’t have time to do the full hike is to park your car directly at Fanal rather than on the Paul da Serra plateau.
The footpath is pretty clear with no cliffs or dangerous drop-offs. True there are some sections of the hike that are a little more challenging with some stairs and inclines but it is a rather easy-moderate hike that can easily be done with kids for family.
If you stay in Madeira only for a few days, you can skip this hike. But in that case, you can still stop at Fanal parking and take a few pictures of the magnificent trees at the magical Fanal forest.
Trail brochure
See below the official brochure of this road –


